Long time no post, right? I kinda took a break from my craft desk for a better part of a week to focus on some computer programming, you know, that thing that I went to school to do. With the release of
RunMonster to the App Store, things have gotten a little more exciting around here as we try to answer user feedback and start hyping the app to new customers. We had one big break last week that gave many hits to the website and we now have more than 3500 downloads! Cool, huh? Of course, all good apps need to keep updating so there's always more work to be done!
But today after successfully moving my craft desk to our spare bedroom I had a little time to play. First off was to make sure to get an entry in for the
Waltzingmouse Stamps Sketch Challenge #1. Claire and her design team kicked off a new challenge blog Saturday with the first sketch. As a big fan of WMS and sketches, this is right up my alley!
Here's the sketch:

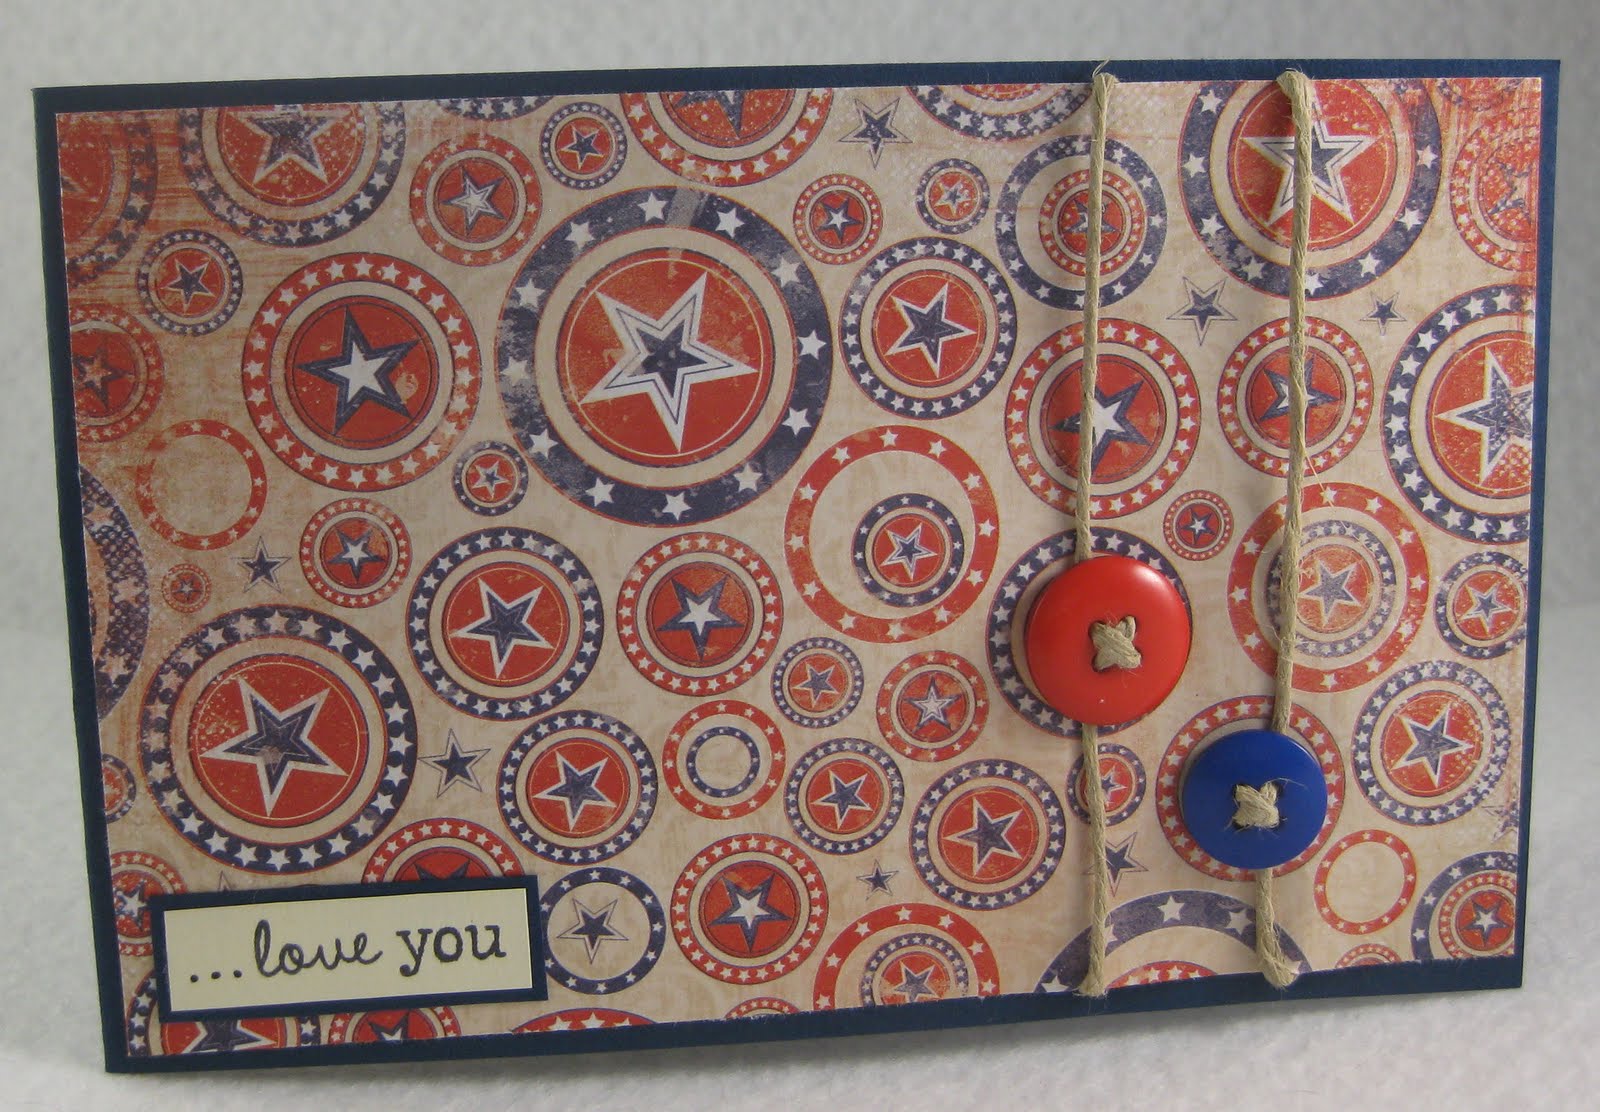
Here's my take:
I decided to use Faux Fun Circles and Fancy Phrases for my card today. I am also very much into using my distress inks and pulled out my new Worn Lipstick color for the first time. I love how the color just fills in the background of the stamps with this technique! This was my first time using the Fancy Phrases stamps too and I am liking that many of them fit in that fancy little circle space. :)
Challenges:
*
WMSC 1 (sketch)
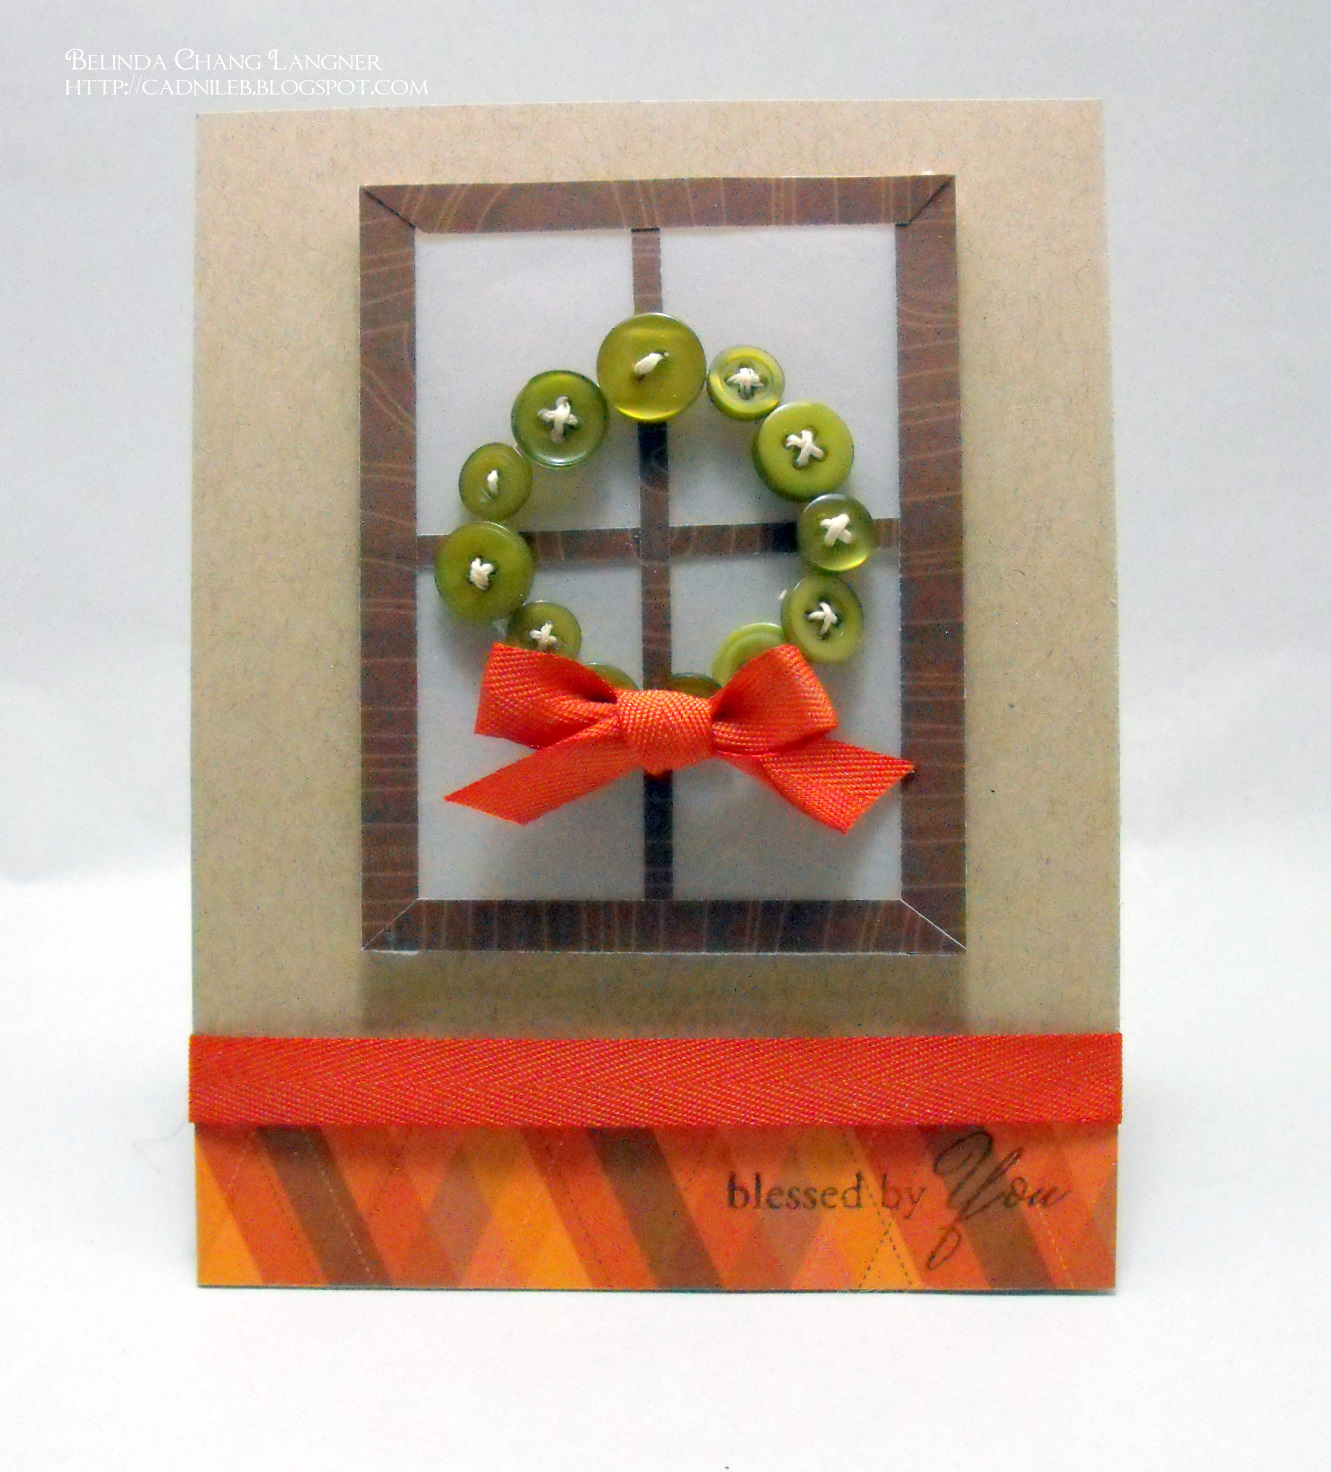
And once I got going, I couldn't just stop at one card. I needed a graduation card here soon too, so that inspired the theme of my next card.
I used CPS 170:

Here's my take:
Keeping this card simple was the name of the game here. For one, it's for DH's cousin so I didn't think he'd appreciate girly elements. I did make it fun by being sure to use the school colors (Oregon State) though since he's in the band. As a band geek myself, I know school pride runs pretty high. I did take liberty in flipping the sketch vertically. The main focal point is a graduation sticker from a set I've had in my stash forever. So nice to use my stash!
Challenges:
*
CPS 170 (sketch)
So I know things got a little long here, but thanks for sticking with me. I hope to get in a few more projects along with my coding to keep up the blog with fresh posts. I do enjoy this little blog of mine. :)
Thanks for stopping by!
DETAILS:
(card 1)
Paper - Black Polka Dot (DCWV) & Stash (don't you love it when scraps can be used?)
Stamps - Waltzingmouse Stamps (Fancy Phrases and Faux Fun Circles), Ink (Tim Holtz Distress Ink - Worn Lipstick), Embossing Powder (A La Mode)
Embellishments - Ribbon (Michaels), Button (Stash), Dry Embossing (Cuttlebug Folder - Swirls)
(card 2)
Paper - Patterned (Basic Grey), Solids (DCWV)
Image - Graduation Sticker (Sandy Lion)
Embellishments - Border Punch (Fiskers)


